Phil Underwood's documented restoration of a Spencer blower, Continued....

Click on photos to enlarge

blowerin.jpg To take apart a Spencer blower the first thing is to unwire the motor. After that is done then go to the inlet end of the blower (picture blowerin.jpg). Some Spencers have the inlet dampers that are shown here, some have a screen, and some have nothing. . .
blower1stg.jpg Remove whatever is there and the blower will look like picture blower1stg.jpg. This is the inlet stage plate and you can see the impeller
stageclip.jpg Remove the plate retaining pieces(picture stageclip.jpg). On this blower there are three
stagepull.jpg After removing all of the plate retaining pieces find the pulling ring on the plate(picture stagepull.jpg). Thread a piece of rope through the ring and pull really hard. You will then be able to remove the plate. There is felt around the outside of the plate that provides the seal. If it is not damaged it can be reused, make sure it is attached to the plate. If it is not re-glue it to the plate.
impeller1.jpg You can now see the 1st stage impeller (picture impeller1.jpg). After loosening the impeller retaining bolts the impeller can be easily pulled straight off the shaft. If the impeller has bolts that grip the shaft ,as this one does, try not to rotate the impeller on the shaft. There are little "bumps" on the shaft (caused by the bolts) which will bind the impeller. If the impeller is "clamped" on the shaft there is less likelyhood of this happening.
divider.jpg

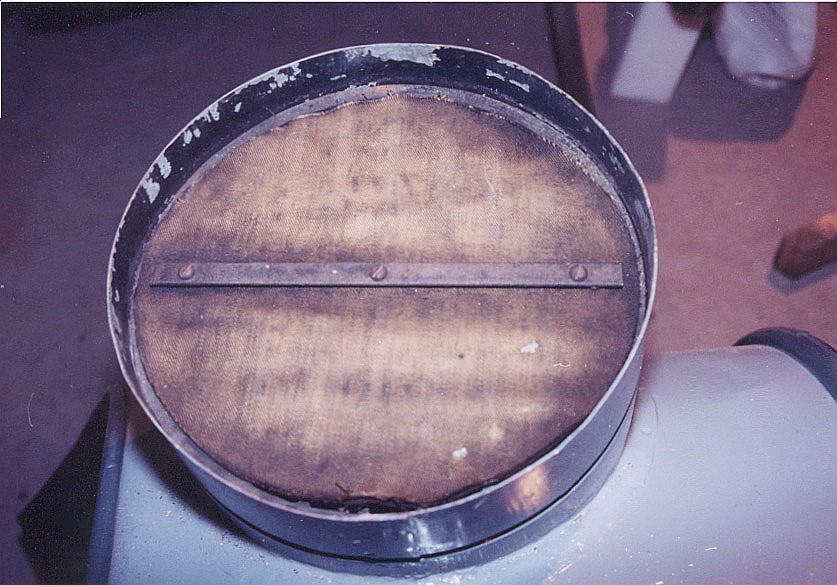
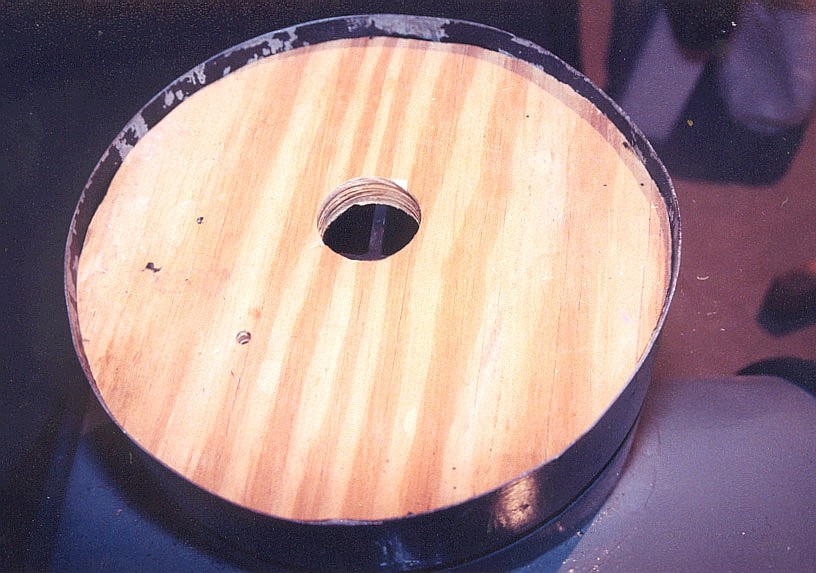
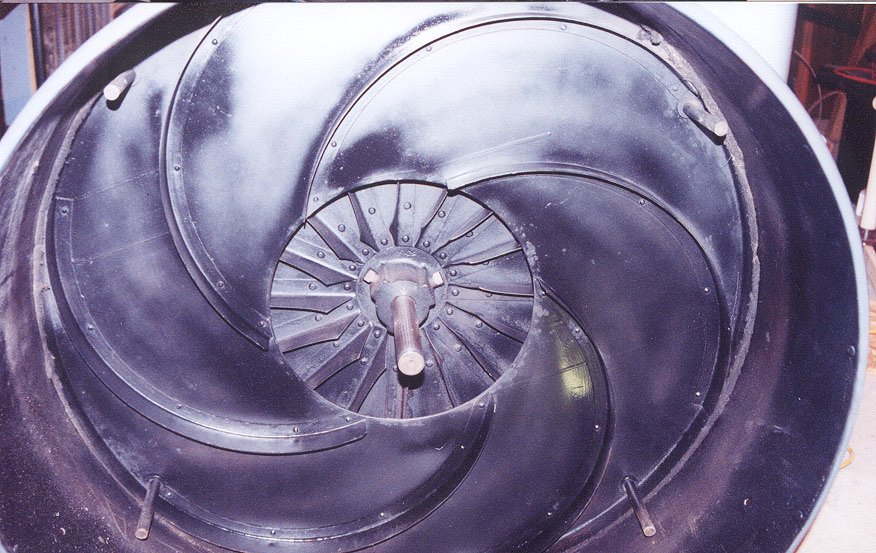
You will now see the seperating plate that goes between the stages (picture divider.jpg). This divider is removed the same as the previous plate. Find the retaining ring and pull hard. Keep doing this until all of the impellers and divider plates have been removed. This single pressure blower has only 2 stages that are identical. On the blowers that have multiple pressures the stages could be different. Mark them so that they are placed back in the same order. The sperating plate has "guiding" fins that help steer the air into the next stage. These will tell you the blower rotation. As the fins spiral into the center, they spirial in the direction of the shaft rotation. On this blower the direction is clockwise from the motor end.


shaftseala.jpg Now that all of the impellers have been removed from the shaft you can remove the motor. The motors are all heavy so you will need help. Unbolt the motor from it's supports. On this blower there are spacers between the motor and the supports. The front spacers are a different length then the rear so mark them before you take them out. Once the motor is unbolted carefully remove the motor. Do not use the shaft as a lifting handle. You could damage it. The motor shaft has a seal on the blower plate where it enters the blower (picture shaftseala.jpg) If you can not pull the motor straight out remove the bolts holding the seal plates in. This will keep you from damaging the shaft seal as you remove the motor.
shaftseal.jpg The shaft seal has four basic parts(picture shaftseal.jpg). The part on the left is the gasket that goes against the blower plate. The second part from the left is the steel plate that makes up the blower side of the seal. The third part from the left is the actual shaft seal. It is made of course hair felt that is very hard. It does not rotate with the shaft. The last part is the steel plate that makes up the motor side of the seal. On the motor shaft there is also a hard leather disc that help keeps any air that does get past the shaft seal from getting into the bearings (shaftseala.jpg). This disc rotates with the shaft. On this blower there are actually two discs.
blonomot.jpg After you remove the motor the blower will look like picture blonomot.jpg. At this point you can remove all of the motor mounts and the last blower plate (picture blowershell.jpg). The last blower plate has more of the plate retaining pieces. On this blower they had two bolts to each piece. Now you can clean all of the oil and grease residue from the shell and paint the blower your favorite color.
blowershell.jpg Scrub all of the dirt off of the impellers and paint them. Check the impellers for any loose rivets. There are balancing weights riveted to the impellers. If you find any holes that do not have rivets in them try and see if there is any sign of missing weights. If the impellers have lost a weight you will have to have them re-balanced. This is usually done after the blower is re-assembled by special equipment. The blower will have to be run to find out where the impeller is out of balance and the weight re-installed. You will have to have this done by someone that has the the equipment. The impellers should be flat and all of the blades should be straight and even. There is some bending of the blades toward the center of the impeller for air flow reasons.

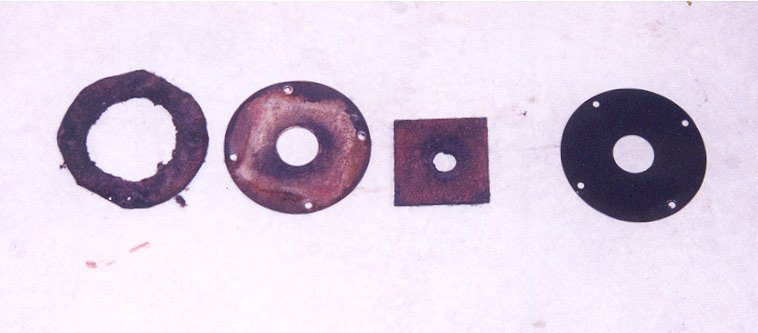
Scrub the stage dividers and repaint them. Check the blades on the dividers for loose rivets and make sure they are not bent or damaged.
impeller1.jpg Now that everything is cleaned and painted you can start putting it back together. Put the blower plate with the shaft seal back in the shell and drive it up against the stops. If you place the bottom of the plate in first and then tip the plate up in goes in easier. You will have to get a block of wood and a hammer to drive it into place. Drive only on the outside edges. You do not want to warp the plates. Make sure that it is in contact with the all of the stops. Re-install the plate retaining pieces and tighten the bolts really well. You do not want these to come loose. If you want to you can use some "stud lock" on the bolts. Just make sure you get the removable kind. Put the motor supports in and loosely install the bolts. Place the motor and it's spacers back on the motor supports. Be very careful with the shaft seal when you re-install the motor. If you have to, you can put all of the shaft seal parts on the motor shaft first then attach it to the blower plate after the motor is in place. Tighten the bolts holding the motor to the supports. Now you can tighten the motor support bolts. This makes sure that the supports are installed parallel to the motor.
impellerset.jpg To make sure, now loosen the motor bolts and make sure the motor sits flat on the supports and does not have any gaps between the motor and the supports. If there is you will have to shim with steel or brass shims. Re-tighten the motor bolts and make sure all the bolts are tight. The blower should then look like picture blowermot.jpg. The shaft should be centered in the blower shell and parallel to the shell walls. If not you will have to shim the motor until it is. Now you can start putting the impellers on the shaft. If you look at the motor shaft there will be a line scratched into it. This is the alignment line for the impellers. If you have replaced the motor you will have to draw a line on the new shaft (picture impellerset.jpg). The line in this picture was added since the scratched line did not show up in the picture.
There is a arrow on the impeller that gets lined up with the shaft line. Now you can re-install the divider plate and drive it up against it's stops. After the divider plate is in you can set the blade gap. The Spencer instructions tell you to set it at .5". If you set it closer you can get a little more pressure out of the blower but if it is set to close the impeller could hit the divider plate. Pull the impeller plate toward the divider plate until it touches. On this blower this left a .25" gap due to the blades having some taper from inside to out or the divider plate being bowed out a little. I set the impeller at the .5" as in picture impellergap.jpg. Tighten the impeller bolts really well. Again you can use some "stud lock" if you feel the need. On this impellers the bolts "bite" into the shaft to hold the impeller in place. Some impellers might be clamped on to the shaft. Continue re-installing each stage and divider plate until they are all in.
blowerout.jpg Now that the blower is all back together you might want to test it without it being hooked up to an organ. You can not run the blower for any length of time without anything hooked up to the outlet. The outlet has a back draft valve (picture blowerout.jpg) that keeps air from going thru the blower when it is not on. Remove this valve (which is just a piece of heavy canvas) and replace it with a piece of plywood with a hole drilled in it (picture blowertest.jpg).
blowertest.jpg Clamp the piece in with something to keep it from flying out. The hole is 1.5 inches. It just allows the blower to move some air. If the blower does not move any air it will rapidly get hot. The hole size is not critical as long as it blocks most of the air flow.
spencerplate.jpg Now you can start the blower. It should come up to speed and run with very little vibration and noise. If the blower has a lot of vibration you will need to find someone to balance it for you. You can check the static by drilling a smaller hole and hooking up your pressure gauge. The blower should make at least the static pressure that is on the tag (picture spencerplate.jpg).
blowerdone.jpg If everything is ok you are done with the blower and ready to hook it up to your organ! The finished blower will look like picture blowerdone.jpg if you do not have the inlet damper.

You can contact Phil Underwood by emailing him FROM THIS LINK.

return to A.T.O.S.-S.M.G.C. Knowledge Base....